How to Take the Perfect Photo for Dog Breed Detection
Breed Identification • By Dog Breed Detector Editorial Team • 2025-08-25 (Updated 2026-09-02)
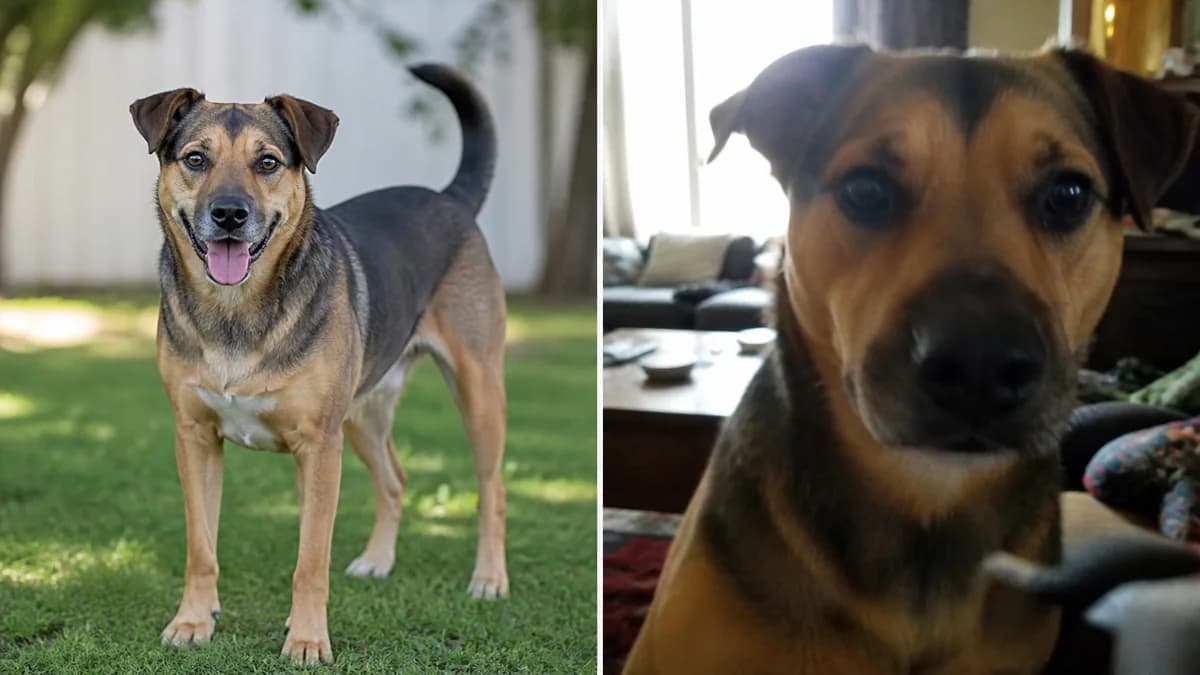
Real photo examples: useful vs harder to identify
These licensed benchmark photos show why subject size, pose, and background matter. “Harder” does not mean unusable—it means the image provides less diagnostic evidence by itself.
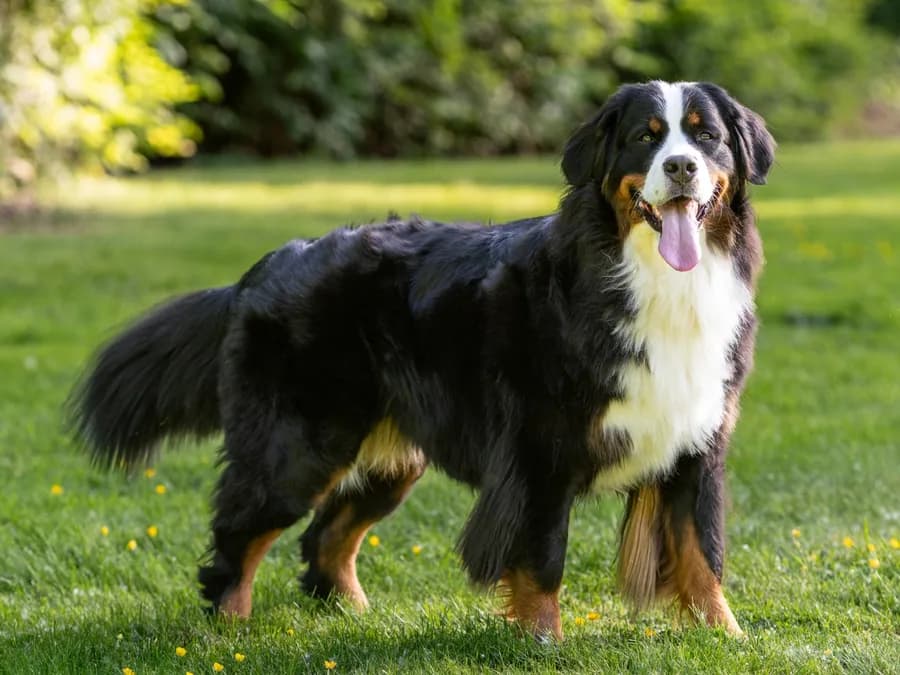
Useful reference photo
The standing side view shows leg length, chest depth, coat pattern, tail, and overall silhouette in even natural light.
Photo by FriendlyToaster · CC BY 4.0
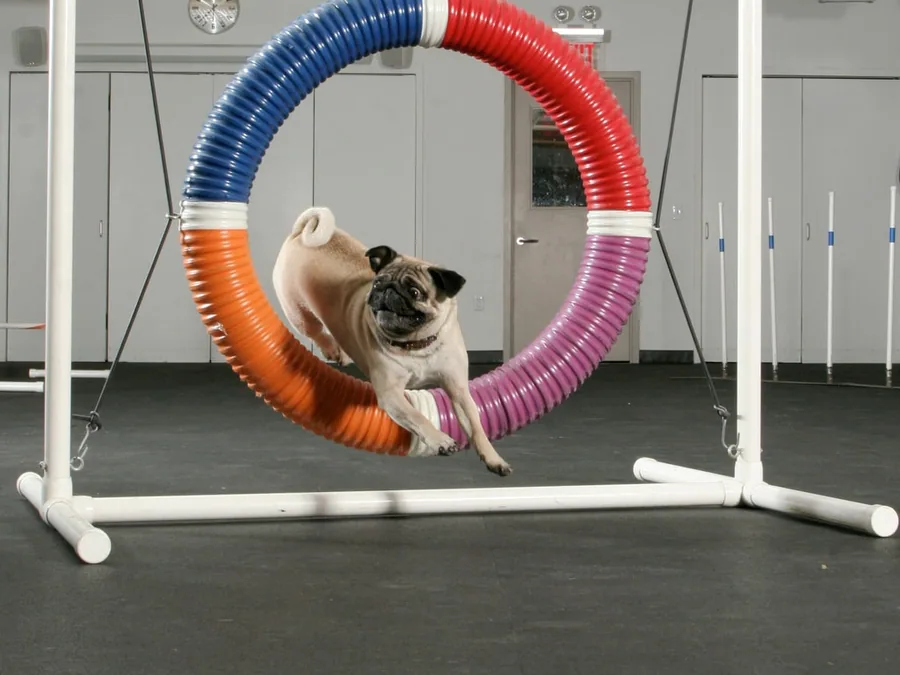
Harder reference photo
The dog is small in the frame and moving, while the hoop and room dominate the image. Crop closer or take a separate standing photo.
Photo by Andrea Arden · CC BY 2.0
Breed identification gets much easier when the detector can clearly see how your dog is built. The goal is not the cutest picture you have. It is the clearest view of the ears, muzzle, chest, legs, tail, and coat, because those are the features that separate one breed, or one mix, from another. This guide covers what to shoot, why it matters, and how to get there with the phone in your pocket.
The 60-second checklist
If you only read one section, make it this one.
- Full body: head to tail in the frame, nothing cropped off.
- Side profile: the dog standing, seen from the side.
- Eye level: crouch so the camera is level with the dog’s shoulder.
- Natural light: daylight, ideally bright shade or an overcast sky.
- Plain background: grass, pavement, a bare wall, or an empty floor.
- One dog: no other dogs, people, or toys sharing the frame.
- No filters: no beauty modes, color effects, or heavy edits.
- Sharp focus: tap on the dog, hold still, and check the photo before you upload.
That is enough for most dogs. The rest of this article explains why each item matters and how to handle the harder cases.
What the detector needs to see
An image model does not know your dog’s name or history. It reads visual patterns: head shape and muzzle length, ear set, coat length and texture, leg length relative to the body, chest depth, tail carriage, and where the color patterns sit. It compares those patterns with what it learned from many labeled photos and returns a ranked shortlist. We walk through the process in how AI dog breed detection works.
The point for photography is that many breeds share most of those traits and differ on only one or two. A German Shepherd and a Belgian Malinois share a silhouette and are separated mostly by coat and color. Our page on commonly confused dog breeds lists the look-alike groups the detector is measured against. If your photo hides the one trait that tells two breeds apart, the model has to guess, and the scores end up spread across several close matches. A clear photo is how you hand the model the evidence it needs.
Angle and distance
The best single photo is a standing side profile, taken from a few steps back at the dog’s eye level. It shows leg length, back length, chest depth, tail set, and the overall outline in one shot. A front view of the head and chest is a useful second photo because it shows ear set, muzzle width, and eye spacing.
A tight face shot feels natural because that is how we look at dogs, but for breed identification it is one of the weakest photos you can take. A face crop removes leg length, body length, chest depth, and tail, which are exactly the traits that separate a Dachshund from a long-coated terrier, or a Basset Hound from a heavier scent hound. Phone lenses also exaggerate whatever is closest to the camera, so a nose pushed toward the lens looks longer than it is and the head looks out of scale with the body. The same goes for short-muzzled dogs like the French Bulldog: show the whole head shape and the body build, not just the face.
Shooting from standing height, looking down, flattens the body and shrinks the legs, and small dogs suffer most. Crouch, kneel, or set the phone on the ground and tilt it up slightly.
Lighting
Light decides whether coat texture and markings are visible at all. Bright open shade or a lightly overcast sky is the easiest light to work with because it is even and soft. Three situations cause most of the trouble.
Backlight
When the sun or a bright window is behind the dog, the camera exposes for the background and the dog turns into a dark shape. Coat texture, mask patterns, and eye color all vanish. Turn around so the light falls on the dog, or move a few steps so the bright source is off to one side.
Harsh noon shadows
Midday sun straight overhead throws hard shadows under the muzzle, brow, and belly. Those shadows can read as dark markings or hide real ones, and light coats blow out to pure white. Wait for the sun to drop, or move the dog fully into the shade of a building or tree, away from the edge where patches of sun cut across the body.
Indoor tungsten cast
Ordinary indoor bulbs give photos a yellow or orange cast that shifts coat color. A cream coat can look apricot and a blue merle can look brown, and the low light slows the shutter, which adds blur and noise. If you have to shoot inside, stand the dog beside the largest window in the house with the window to your side or behind you, and turn off the room lights so they do not mix with the daylight.
Background and clutter
A busy background pulls attention from the dog and adds shapes and textures that can be mistaken for parts of the dog. A patterned rug next to a brindle coat, a wicker basket beside a wiry terrier, or another animal in the frame all make the model’s job harder. Look for a plain surface, and use contrast: put a dark dog in front of a lighter background and a white dog in front of something darker or greener.
Leashes and harnesses are fine as long as they do not cover the chest. Coats, sweaters, bandanas, and costumes should come off for the photo. A dog wearing a jacket is a dog with no visible body.
Motion and focus
Motion blur softens every edge the model uses, and a blurred coat can look longer or smoother than it is. The fix is mostly patience. Ask the dog to sit or stand, wait for a calm moment, and take several frames in a row. Burst mode, which on most phones you get by holding the shutter button, gives you a set to choose from.
Focus is a separate problem. Phones sometimes lock onto a fence or the grass in front of the dog. Tap the dog’s shoulder or face on the screen before you shoot, then zoom in on the result and check that the fur has visible texture. If the eyes and coat look soft, take it again. A sharp photo of a plain sitting dog beats a blurry photo of a dramatic pose every time.
Puppies and seniors
Puppies are the hardest age to photograph for breed identification because their proportions are still changing. Legs are short, heads are round, ears may not have settled, and the puppy coat is often softer than the adult coat. Expect a wider spread of guesses than you would get for an adult. Get the cleanest standing side view you can, add a front view of the head, and plan to upload again in a few months as the body catches up. If the puppy will not hold still, have someone hold a treat just above the camera and shoot in bursts.
Senior dogs bring different challenges. A grey muzzle can look like a mask or blaze that was never there, a thinning coat can change the apparent texture, and a stiff dog may stand with a lowered head or tucked tail, which changes the outline. Let an older dog settle and stand however is comfortable. If the stance looks unusual, take a second photo while the dog is sitting square so the head and ears are clearly visible.
Coat and grooming timing
Grooming changes what a dog looks like more than most people expect. A freshly clipped Poodle mix, a doodle with a short summer cut, or a Cocker Spaniel shaved for the season can look like a different breed group entirely. A dog straight from the bath looks thinner and darker because wet fur lies flat, while a badly overgrown dog hides its eyes, ears, and feet under hair.
The most useful time to photograph is a few weeks after a groom, when the coat has its normal length and shape but is not matted. If you only have a freshly clipped dog to work with, upload the photo anyway and add one from before the appointment if you have it. Two photos from different grooming states give the model a fairer look at the coat.
Black dogs and white dogs
Solid black and solid white coats are exposure problems. A camera that meters the whole scene renders a black dog as a featureless silhouette and a white dog as a glowing blob, and in both cases the coat texture disappears. The fix is the same for both. Tap on the dog to set focus, then drag the exposure control (on most phones it is a small sun icon beside the focus box) up for a black dog and down for a white dog until you can see individual hairs. Shoot black dogs in bright open shade against a lighter background. Keep white dogs out of direct sun and give them something darker behind them. For brindle and sable coats, angle the dog so light rakes across the coat from the side, which keeps the stripes and shading from blending into one tone.
Phone-specific tips
- Tap to focus. Always tap on the dog before you shoot. It sets both focus and exposure on the dog instead of the background.
- Avoid digital zoom. Pinching to zoom crops and stretches the image, which softens detail. Walk a few steps closer instead, or use the phone’s dedicated telephoto lens if it has one.
- Skip portrait mode. The background blur is simulated and often eats the edges of ears, whiskers, and fluffy coats. Use the standard photo mode.
- Turn off filters and beauty modes. Anything that smooths, sharpens, or shifts color hides the texture and markings the model reads.
- HEIC is supported. iPhones save photos as HEIC by default. Upload those directly and the identifier converts them for you. There is no need to change camera settings or export to JPG first.
- Use the original, not a screenshot. A screenshot is lower resolution and often includes interface elements. Upload the file from your camera roll.
Taking two or three photos for a mixed dog
A single photo shows one side of a dog. For a mix, that is often not enough, because the traits that point to each parent breed may be visible from different angles. A plan that works well:
- Standing side profile for the outline, leg length, and tail.
- Front view of head and chest for ear set, muzzle shape, and chest width.
- One more from a different day or setting, ideally in different light, to check that the result holds up.
Upload each photo separately and compare the shortlists. If the same two or three breeds appear across all of them, that is a much stronger signal than a single high score. If the results change completely from photo to photo, the model is finding weak evidence in each, and the honest answer is that the photos cannot resolve the mix. That is common, and it is a good moment to read our guide to what breed is my dog for the next steps. Cross-check the shortlist against visible traits too: a Shetland Sheepdog has a collie-like outline, while a Basset Hound has very short legs and long ears.
Shelter and rescue intake photos
If you photograph dogs for a shelter or rescue, you are working under time pressure with an animal you have known for ten minutes. The same rules apply, and a short routine makes them fast. Print this and keep it near the intake area.
- Take the dog outside or to the brightest plain wall you have. No kennel bars behind the dog.
- Keep the intake tag out of the way if it covers the chest. A slip lead is fine.
- One standing side photo, camera at the dog’s shoulder height, whole body in frame.
- One front photo of head and chest, ears in their natural position.
- Lift the dog’s attention with a squeaker or treat held above the lens.
- Check each photo for focus before moving on. Retake now rather than sort later.
- Name the files with the intake number so the photos stay with the right dog.
Those photos work for the breed identifier, the adoption listing, and the medical file, so the extra minute pays for itself several times over.
Frequently asked questions
Does the photo need to be high resolution?
No. Any modern phone photo has far more resolution than the model uses. Sharpness and light matter far more than pixel count.
Can I use a photo from social media?
You can, but expect weaker results. Social platforms compress images heavily and strip fine coat detail. Use the original file whenever you have it.
Should I crop the photo before uploading?
Crop if the dog is small in the frame or if another dog or person is in the shot. Keep the whole body inside the crop and leave a little space around the ears and tail.
What if my dog will not stand still?
Hold a treat or toy just above the camera, take bursts, and choose the sharpest frame. A sitting photo with a clear view of head, chest, and front legs is a fine fallback, as long as you also try for one standing side view when the dog is calmer.
Ready to try? Take your side profile and front view, then identify your dog by picture with the free online tool. Upload the photos one at a time and compare the shortlists.